A crunchy, flavor-packed treat that’s perfect for breakfast or snacking. Discover the secrets to homemade granola here!
Homemade Granola: Why It’s Worth Making
Many people wonder if making their own granola is truly worth the effort. However, once you discover the benefits, you might never look back. First and foremost, homemade granola grants full control over ingredient quality. Store-bought brands can include hidden additives, artificial flavors, and excessive sugar. Consequently, these additives may diminish the nutritional value. By preparing a batch at home, you choose fresh and natural components.
Essentially, you can handpick premium rolled oats, high-quality nuts, and organic sweeteners. Furthermore, you decide exactly how sweet or crunchy you want the final product. If you’re mindful of your sugar intake, you can opt for minimal sweeteners or use honey instead. Some prefer maple syrup for its richer aroma. Others may prefer coconut sugar for its lower glycemic index. Regardless of your preference, you have the freedom to experiment.
Another key advantage is customization. Perhaps you love a specific type of nut or dried fruit. Insert that into your personal recipe and skip items you dislike. You can also experiment with spices like cinnamon, nutmeg, or even a hint of cardamom. Particularly, unique blends of seeds, nuts, or spices transform your granola from ordinary to sensational.
Hygiene is another reason homemade granola stands out. You know exactly how your meal was prepared and can ensure proper handling. For families with allergies, homemade options let you omit triggering ingredients. Thus, everyone can savor a tasty breakfast without worry. Meanwhile, if you’re gluten-free, choose certified gluten-free oats. Hence, no cross-contamination.
Altogether, the reasons to try homemade granola are vast and compelling. From controlling sugar content to adding a personal twist, each batch is a reflection of your creativity. Because of this flexibility, granola becomes more than just a quick breakfast option. It becomes a heartfelt culinary experience that supports your health goals. Eventually, you’ll find yourself reaching for your homemade stash day after day.
Essential Tools for Homemade Granola
Before you dive into mixing oats and toppings, gather the proper tools. First, a large mixing bowl is vital for combining all ingredients. It allows enough space to coat everything evenly. Second, a sturdy wooden spoon or silicone spatula is helpful for blending. This tool also makes it simpler to spread the mixture on your baking sheet. Furthermore, a rimmed baking tray or cookie sheet is important. A rim prevents spillage in the oven.
Additionally, invest in quality parchment paper or a silicone baking mat. Both options prevent sticking and ensure easier cleanup. Meanwhile, an airtight container or Mason jar is essential for storing your homemade granola after it cools. In most cases, a clean jar with a secure seal keeps it fresh for up to two weeks. With these simple items, you can make the preparation and storage process smooth and stress-free.
How to Prepare Homemade Granola Step by Step
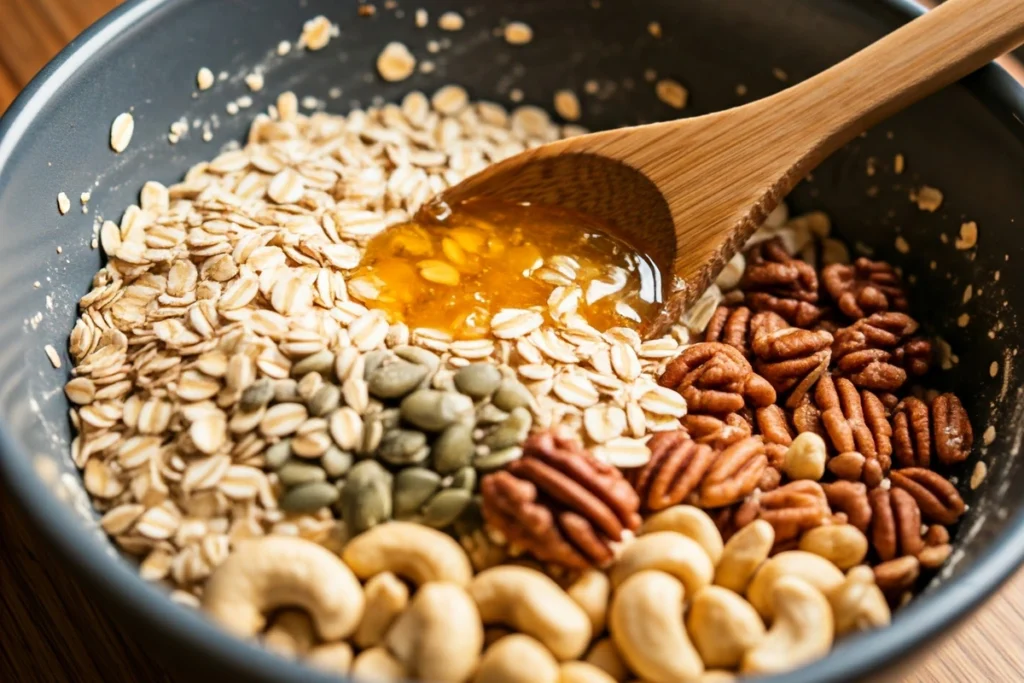
Crafting homemade granola is surprisingly easy, particularly if you follow a straightforward process. Initially, preheat your oven to 325°F. This moderate temperature helps toast the oats evenly without burning them. Meanwhile, gather your dry ingredients in a large bowl. Common choices include rolled oats, chopped almonds, sunflower seeds, and a pinch of salt. You can swap almonds for other nuts, such as pecans or walnuts, depending on your preference.

Next, combine your wet ingredients in a separate container. Typically, this involves a sweetener and a form of oil or fat. For example, mix melted coconut oil and honey together. Alternatively, you can use olive oil and maple syrup. Stir these liquids thoroughly until the mixture is smooth. Then, pour it over your dry ingredients. Toss everything gently, ensuring an even coat on all components.
Subsequently, spread the granola mixture onto a parchment-lined baking sheet. Make sure it’s in a thin, even layer for consistent browning. Often, lumps can lead to uneven cooking. However, if you prefer big clusters, press the mixture slightly before baking. This simple trick helps the oats stick together.
Place the tray in your preheated oven and bake for 10 to 15 minutes. Afterward, remove it and stir the mixture to prevent scorching. Return it to the oven for another 10 to 15 minutes, or until golden brown. Keep an eye on it because granola can quickly go from toasted to burnt.
Finally, taste-test your fresh batch of homemade granola. Adjust the sweetness, salt level, or any additional ingredients for future batches. Because this recipe is flexible, you can modify it anytime. Indeed, it’s an excellent way to refine your breakfast routine without excessive effort. In short, the process is straightforward and guarantees a wholesome, flavorful result.
Flavor Variations for Homemade Granola
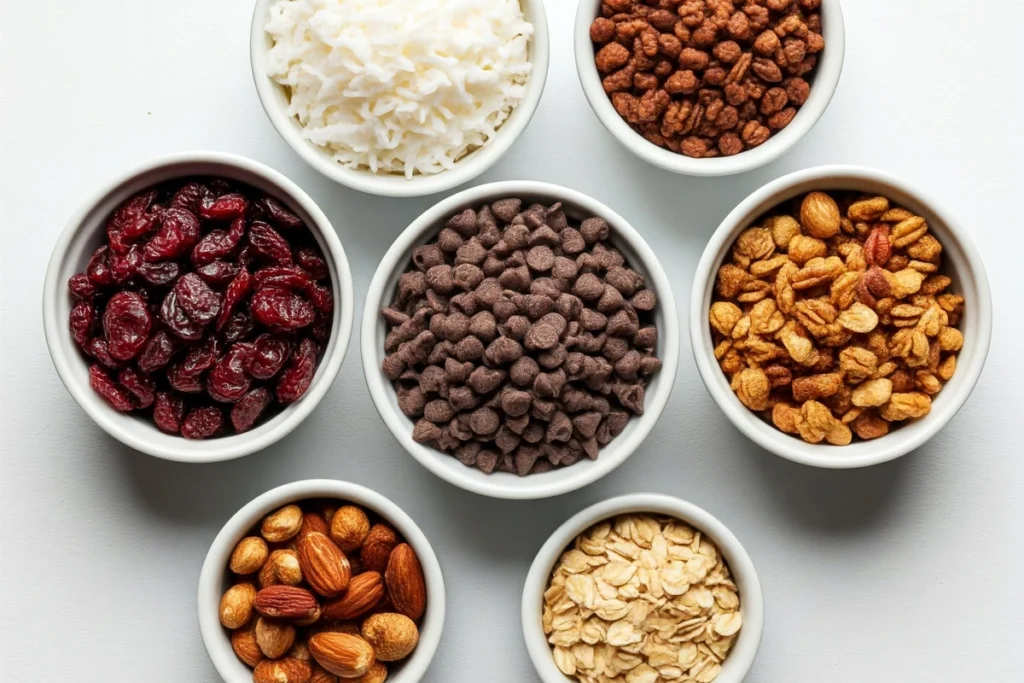
Granola need not be boring. There are countless ways to customize homemade granola with exciting flavor profiles. For a tropical twist, add coconut flakes, dried pineapple, and macadamia nuts. Alternatively, create a warm autumn blend with pumpkin pie spice, dried apples, and pecans. If you prefer a sweeter dessert-like treat, stir in dark chocolate chips and freeze-dried berries.
Additionally, consider adding spices like cardamom, cinnamon, or ginger to elevate the aroma. Drizzle a bit of melted peanut butter or almond butter over the granola for extra richness. Conversely, if you enjoy savory flavors, sprinkle a hint of sea salt and rosemary. Always introduce these extras thoughtfully. You don’t want to overshadow the foundational taste of oats and nuts. The key is to maintain balance while exploring new combinations.
Storing Homemade Granola and Keeping It Fresh
Proper storage is vital for maintaining freshness. Once your homemade granola has cooled, transfer it to an airtight container or jar with a tight-fitting lid. Plastic containers work, but glass jars often help preserve flavor longer. Because exposure to air can make granola stale, ensure the seal is secure.
Additionally, place the container in a cool, dry area, away from direct sunlight. High heat or moisture can reduce crunchiness and shorten shelf life. If stored properly, your granola typically remains crisp for two weeks. However, if you notice any change in taste or texture, consider making a new batch.
For those who love meal prepping, homemade granola can be prepared in large quantities. Yet, it’s wise to store some portions in smaller bags or jars. This practice keeps the rest sealed while you enjoy one portion. Consequently, your large batch stays fresher for longer.
If you’d like to extend its shelf life, consider freezing it. Granola freezes well in zip-top bags. Whenever you crave a crunchy topping, remove a portion from the freezer and let it thaw at room temperature. In many cases, the thawed granola remains crispy and delicious.
Meanwhile, pay attention to the ingredients used. Nuts and seeds can go rancid over time. Therefore, it’s good practice to use fresh nuts or store them separately if you’re making a very large amount. In short, keeping your granola fresh is easy with a few precautions. Eventually, you’ll master these methods and always have a tasty snack on hand.
Common Mistakes When Making Homemade Granola
Despite the straightforward process, errors can occur. One frequent mistake is baking at too high a temperature. A hotter oven may burn the outer edges while leaving the center undercooked. Conversely, some people forget to stir halfway through. Stirring ensures even browning and prevents clusters from scorching.
Additionally, adding dried fruits too soon can result in burnt, bitter-tasting pieces. It’s best to mix them in after baking. Another error is using too much sweetener or oil. Basically, this can lead to sticky, overly sweet granola.
Sometimes, new cooks skip measuring ingredients properly. A little extra salt or not enough oats can throw off the final taste. Pay attention to ratios to avoid these pitfalls. Finally, storing homemade granola before it has fully cooled traps moisture. This step creates a soggy texture. Always let it cool completely before sealing.
Nutritional Information (Per 100g)
| Component | Approx. Amount |
|---|---|
| Calories | 450-500 kcal |
| Carbohydrates | 55-60 g |
| Proteins | 10-12 g |
| Fats | 15-20 g |
| Fiber | 5-7 g |
| Sugar | 10-15 g |
| Sodium | 50-100 mg |

Additional Expert Tips
Sometimes, a minor change can significantly enhance the taste of your granola. Experiment with different types of oats to find the texture you prefer. Steel-cut oats yield a chewier bite, whereas rolled oats produce a more classic, crispy result. Moreover, consider roasting your nuts or seeds separately before mixing them in. This method can intensify their flavor and aroma.
If you crave extra sweetness but still want a healthier option, finely chop dates or figs and add them after baking. The natural sugar in dried fruit boosts taste without going overboard on processed sweeteners. Additionally, do not hesitate to try unconventional mixes like turmeric and black pepper for an anti-inflammatory kick. Whatever path you choose, have fun and keep refining your approach for the best possible experience.
Conclusion
Homemade granola elevates any breakfast or snack routine with its crunchy texture and limitless customization. Because you decide what goes in, you can ensure it suits your diet and taste buds. Moreover, making it yourself can save you money. You bypass added sugars and preservatives commonly found in store-bought options.
Ultimately, the process is straightforward and satisfying. It’s not only fun to create your own blends of nuts, seeds, dried fruits, and spices, but it’s also empowering. You will come to appreciate each spoonful more when you know the effort invested. Comparatively, relying on packaged products might seem convenient. Nonetheless, the sense of control and achievement in preparing something from scratch is unmatched.
Eventually, you’ll perfect your personal recipe. Whether you enjoy chocolate chips, a touch of cinnamon, or a savory approach, each batch is a reflection of your preferences. Keep experimenting and refine your method until you find the ideal combination. Indeed, homemade granola can transform mornings into a delicious, nourishing start. Make the switch and taste the difference.
FAQs (People Also Ask)
1. How do I get my granola to form clusters?
To create clusters, press the mixture down on the baking sheet before placing it in the oven. Additionally, avoid stirring too often while it bakes. Wait until the granola cools, then break it into chunks.
2. Can I make homemade granola without oil?
Yes, you can replace oil with mashed banana, applesauce, or nut butter for moisture. However, the texture may be softer and less crispy. Adjust baking time accordingly.
3. Why is my granola too sweet or not sweet enough?
Sweetness largely depends on personal preference. Consequently, add or reduce honey, maple syrup, or sugar according to taste. Taste the mixture before baking to gauge sweetness.
4. Is homemade granola healthy?
Generally, homemade granola is healthier than many store-bought brands because you control the ingredients. However, moderation is still important. Consuming large amounts can increase calorie intake.
5. Can I add fresh fruit instead of dried fruit?
Fresh fruit contains more moisture, which may lead to soggy granola. Conversely, dried fruit keeps the mix crunchy. If you want fresh fruit, add it right before serving.

